Easy Garlic Bread Rolls-Warm Fluffy Flavor
Garlic bread rolls are the unsung heroes of any meal, aren’t they? That warm, fragrant aroma that wafts from the oven, promising pure, unadulterated comfort. I’ve always been a sucker for a perfectly baked garlic bread roll, and honestly, who isn’t? They’re the ultimate crowd-pleaser, a humble yet irresistible accompaniment that elevates everything from a hearty stew to a delicate pasta dish. But what makes these simple garlic bread rolls so incredibly special? It’s that magical combination of pillowy soft dough, a generous slathering of buttery garlic goodness, and a hint of herbs that just sing. They’re more than just bread; they’re edible happiness, a little bite of heaven that’s surprisingly easy to create in your own kitchen.
Why We Can’t Get Enough
The Irresistible Allure of Garlic Bread Rolls
Garlic Bread Rolls
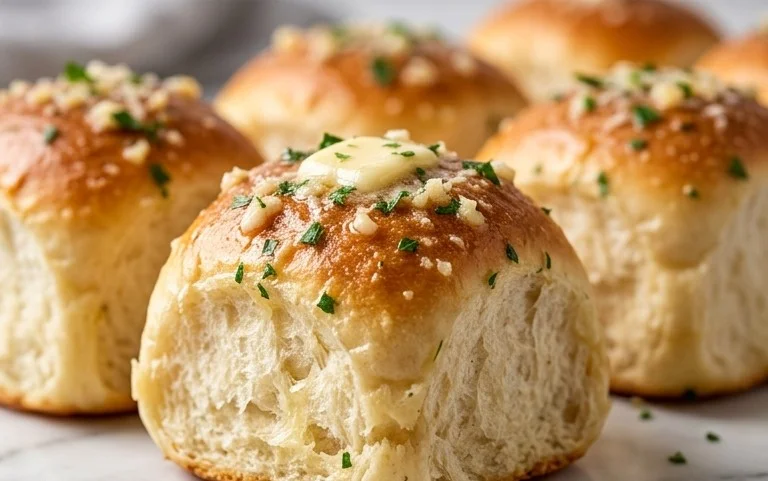
There’s something undeniably comforting about warm, fluffy bread, and when that bread is infused with the irresistible aroma and flavor of garlic and parsley, it becomes pure culinary magic. These Garlic Bread Rolls are perfect for so many occasions – a side to your favorite Italian dish, a delightful addition to a brunch spread, or simply a treat to enjoy on their own with a good slather of butter. They boast a soft, pillowy interior and a delightfully savory crust. Making them from scratch might seem daunting, but I promise, with a little patience and these detailed instructions, you’ll be pulling these golden beauties from your oven in no time.
Ingredients:
- 4 1/2 tablespoons unsalted butter
- 2 tablespoons minced garlic
- 3 1/2 cups + 1 tablespoon all-purpose flour (*See notes below for measuring*)
- 3 tablespoons chopped fresh parsley
- 1 tablespoon granulated sugar
- 2 1/4 teaspoons instant yeast
- 1 teaspoon fine sea salt
- 1 cup whole or 2% milk (warmed to 110°F)
- 1 large egg (room temperature)
- 1 beaten egg, for brushing the tops
- 2 tablespoons unsalted butter
- 1 tablespoon minced garlic
- 1 tablespoon chopped fresh parsley
- flaky sea salt (for finishing)
Notes on Measuring Flour:
To ensure your rolls have the perfect texture, it’s crucial to measure your flour correctly. Avoid scooping directly from the bag with your measuring cup, as this can compact the flour and lead to too much being used. Instead, gently stir the flour in its container, then spoon it lightly into your measuring cup until overflowing. Finally, level it off with a straight edge, like the back of a knife. For this recipe, we need 3 1/2 cups plus an additional tablespoon.
Getting Started: The Dough
The foundation of any great bread is a well-made dough. We’ll start by activating our yeast and then bringing all the components together to create a beautifully soft and workable dough.
Step 1: Activate the Yeast and Mix Wet Ingredients
In a small bowl, combine the warmed milk (it should feel like warm bathwater, not hot, or it will kill the yeast) with the granulated sugar and the instant yeast. Give it a gentle stir. Let it sit for about 5-10 minutes. You should see a foamy layer form on top – this is the yeast waking up and doing its job! If you don’t see foam, your yeast might be old, or the milk was too hot. In a larger mixing bowl, whisk together the room-temperature egg and the fine sea salt. Once the yeast mixture is foamy, pour it into the bowl with the egg and salt.
Step 2: Incorporate Flour and Form the Dough
Now it’s time to add the flour. Add 3 cups of the all-purpose flour to the wet ingredients. Using a sturdy spoon or a dough whisk, start mixing everything together until a shaggy dough begins to form. Don’t worry if it looks a bit sticky at this stage. Gradually add the remaining 1/2 cup + 1 tablespoon of flour, a little at a time, mixing until the dough just comes together. You might not need all of the flour, or you might need a tiny bit more, depending on the humidity in your kitchen. The goal is a dough that is soft and slightly sticky but manageable.
Kneading for a Perfect Texture
Kneading develops the gluten in the flour, which gives our rolls their wonderful chewy texture and structure.
Step 3: Knead the Dough
Turn the dough out onto a lightly floured surface. Begin to knead the dough. You can do this by hand or with a stand mixer fitted with a dough hook. If kneading by hand, push the dough away from you with the heel of your hand, then fold it over on itself and give it a quarter turn. Repeat this process. Continue kneading for about 8-10 minutes, or until the dough is smooth, elastic, and springs back when gently poked. If it’s too sticky, add flour a teaspoon at a time. If it’s too dry, wet your hands slightly and continue kneading. The dough should feel silky and pliable.
The Flavor Infusion: Garlic and Parsley Butter
This is where the magic truly happens! We’ll create a delicious garlic-parsley butter to infuse our rolls with incredible flavor.
Step 4: Prepare the Garlic Butter and Shape the Rolls
In a small bowl, melt the 4 1/2 tablespoons of unsalted butter. Stir in the 2 tablespoons of minced garlic and the 3 tablespoons of chopped fresh parsley. Let this mixture sit for a few minutes to allow the flavors to meld.
Once your dough is kneaded and smooth, place it in a lightly oiled bowl, turning to coat. Cover the bowl tightly with plastic wrap or a damp kitchen towel and let it rise in a warm place for about 1 to 1.5 hours, or until it has doubled in size.
After the dough has risen, punch it down gently to release the air. Turn the dough out onto a lightly floured surface. Roll the dough into a rectangle, approximately 12×18 inches. Brush the entire surface of the dough evenly with the prepared garlic-parsley butter, making sure to get close to the edges. Sprinkle the remaining 3 tablespoons of chopped fresh parsley over the butter. Starting from one of the longer sides, tightly roll up the dough like a jelly roll. Pinch the seam to seal it.
Using a sharp knife or a bench scraper, cut the roll into 12 equal pieces. You can either place these cut sides up in a greased 9×13 inch baking dish, or arrange them slightly apart on a parchment-lined baking sheet if you prefer individual rolls.
Baking to Golden Perfection
The final stage is where our rolls transform into golden, fragrant masterpieces.
Step 5: Second Rise and Baking
Cover the shaped rolls loosely with plastic wrap or a clean kitchen towel and let them rise again in a warm place for about 30-45 minutes, or until they are visibly puffy and have almost doubled in size again. Preheat your oven to 375°F (190°C) during the last 15 minutes of the second rise.
Once the rolls have completed their second rise, gently brush the tops with the beaten egg wash. This will give them a beautiful shine and a lovely golden-brown color.
Bake for 18-22 minutes, or until the rolls are golden brown and sound hollow when tapped on the bottom.
The Finishing Touch
Just before serving, we’ll add one last burst of flavor.
Step 6: Prepare the Topping and Serve
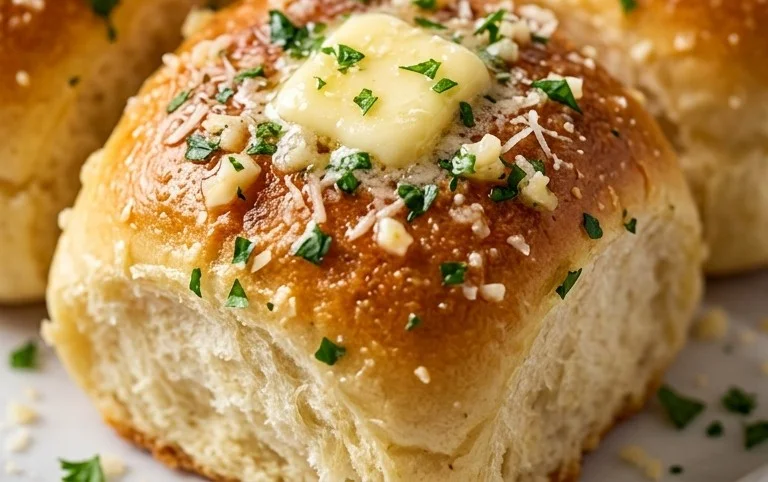
While the rolls are still warm from the oven, melt the remaining 2 tablespoons of unsalted butter. Stir in the final 1 tablespoon of minced garlic and the final 1 tablespoon of chopped fresh parsley. Brush this fragrant garlic butter over the hot rolls. Immediately sprinkle with flaky sea salt for a delightful crunch and an extra pop of flavor.
Let the rolls cool in the pan for a few minutes before transferring them to a wire rack. Serve them warm and enjoy the incredible aroma and taste of your homemade Garlic Bread Rolls! They are truly best enjoyed fresh from the oven.
Conclusion:
I hope you’ve enjoyed learning how to make these irresistible Garlic Bread Rolls! This recipe is truly fantastic because it delivers that perfect balance of soft, fluffy bread and a garlicky, buttery goodness that’s incredibly moreish. They are surprisingly simple to whip up, making them an excellent choice for both weeknight dinners and special occasions. The aroma alone while they’re baking is enough to make your mouth water!
These versatile Garlic Bread Rolls are brilliant alongside pasta dishes, soups, stews, or even just enjoyed on their own as a delicious appetizer. For a little variation, try adding some grated Parmesan cheese to the butter mixture before spreading it on, or sprinkle some fresh chopped parsley or chives over the top just before serving. You could also experiment with a pinch of red pepper flakes for a subtle kick. I highly encourage you to give this recipe a try – I’m confident you’ll be delighted with the results!
Frequently Asked Questions:
How can I make sure my garlic bread rolls are extra crispy?
For extra crispiness, you can brush the tops of the rolls with a little extra melted butter halfway through baking, or pop them under the broiler for 30-60 seconds at the very end, watching them closely to prevent burning. Ensuring your oven is properly preheated also helps achieve a lovely golden crust.
Can I make the garlic butter mixture ahead of time?
Absolutely! You can prepare the garlic butter mixture up to 2 days in advance and store it in an airtight container in the refrigerator. Just let it soften at room temperature for about 15-20 minutes before spreading it on your rolls for easier application.
Garlic Bread Rolls
Soft and flavorful garlic bread rolls, perfect as a side dish or a tasty snack. Infused with garlic and fresh parsley.
Ingredients
-
4 1/2 tablespoons unsalted butter
-
2 tablespoons minced garlic
-
3 1/2 cups + 1 tablespoon all-purpose flour
-
3 tablespoons chopped fresh parsley
-
1 tablespoon granulated sugar
-
2 1/4 teaspoons instant yeast
-
1 teaspoon fine sea salt
-
1 cup whole or 2% milk (warmed to 110°F)
-
1 large egg (room temperature)
-
1 beaten egg, for brushing the tops
-
2 tablespoons unsalted butter
-
1 tablespoon minced garlic
-
1 tablespoon chopped fresh parsley
-
flaky sea salt (for finishing)
Instructions
-
Step 1
In a small saucepan, melt 4 1/2 tablespoons butter over medium heat. Stir in 2 tablespoons minced garlic and cook for 1 minute until fragrant. Remove from heat and let cool slightly. -
Step 2
In a large bowl, whisk together flour, sugar, yeast, and salt. Add the cooled garlic butter mixture, warmed milk, and room temperature egg. Mix until a shaggy dough forms. -
Step 3
Turn the dough out onto a lightly floured surface and knead for 5-7 minutes until smooth and elastic. Place the dough in a greased bowl, cover, and let rise in a warm place for 1 hour, or until doubled in size. -
Step 4
Punch down the dough and divide it into 12 equal pieces. Shape each piece into a ball and place them in a greased 9×13 inch baking dish. -
Step 5
Cover the rolls and let them rise for another 30 minutes. -
Step 6
Preheat oven to 375°F (190°C). Brush the tops of the rolls with the beaten egg. In a small bowl, melt the remaining 2 tablespoons butter. Stir in the remaining 1 tablespoon minced garlic and 1 tablespoon chopped parsley. Drizzle this mixture over the rolls. -
Step 7
Bake for 18-20 minutes, or until golden brown. Sprinkle with flaky sea salt before serving.
Important Information
Nutrition Facts (Per Serving)
It is important to consider this information as approximate and not to use it as definitive health advice.
Allergy Information
Please check ingredients for potential allergens and consult a health professional if in doubt.